Last Updated on March 10, 2024 by Admin
Being online has become super important for businesses, big or small. One big part of being online is making sure people can find your business easily when they search on the internet. You’ve probably heard a lot about Google being the main place for this, but there’s another platform called Bing Places for Business that can help your business get noticed.
It is a free online local business directory tool from Microsoft’s Bing search engine that helps businesses be online and find local customers. With Bing Places, businesses can share important information like where they are located, their phone number, opening hours, and websites.
This info is displayed when people search on Bing and Bing Maps. So, it helps more people find and learn about your business.
In this article, we will discover more about Bing Places and how to list your business in this business directory.
Benefits of Using Bing Places for Local SEO
If you want to optimize your business for local SEO, then you definitely use Bing Places. It comes with some pretty eye-catching benefits.
Bing is still the number two search engine in the world (10.51 per cent market share compared to Google’s 81.95 per cent). So, by listing your business here, you increase your chances of being found by local customers when they search for products or services related to your business.
Secondly, Bing Places is completely free to use. There’s literally no cost to you creating a Bing business listing apart from your time. Also, it’s quite easy to create and manage your account on this platform.
Bing Places integrates with other Microsoft products like Bing Maps. It ensures your business information is accurate and consistent across different platforms.
How to List Your Business on Bing?
Here’s how to list your business on Bing to make it more visible to the right searchers.
- Log in to Business Places: Getting started with Bing Places is easy. All you need to do is visit Bing Places for Business and click on New User. If you already have an account, click Existing User to sign in.

Then you will be asked to choose an email address and password before you solve a CAPTCHA Test.After signing up, Bing will send you a verification code. Once you’ve used that code to confirm your sign-up, you can move on to the next step. - Create or Claim your Business Listing: There are two ways to create a business listing on Bing. First, you can import data from an existing Google Business Profile. Secondly, you can create a Bing Places for Business listing manually.
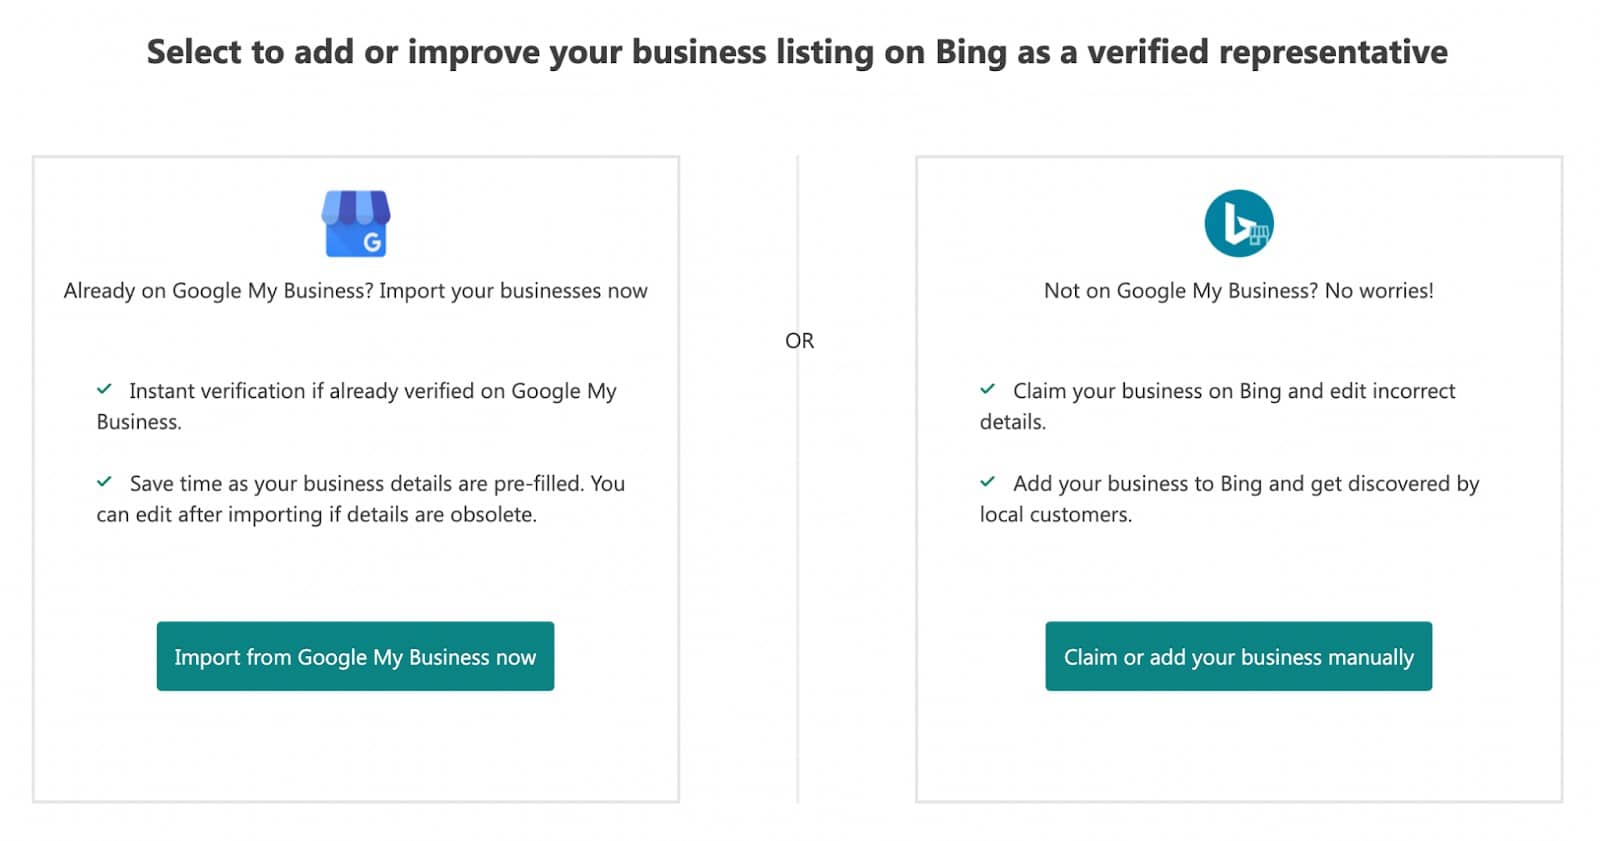
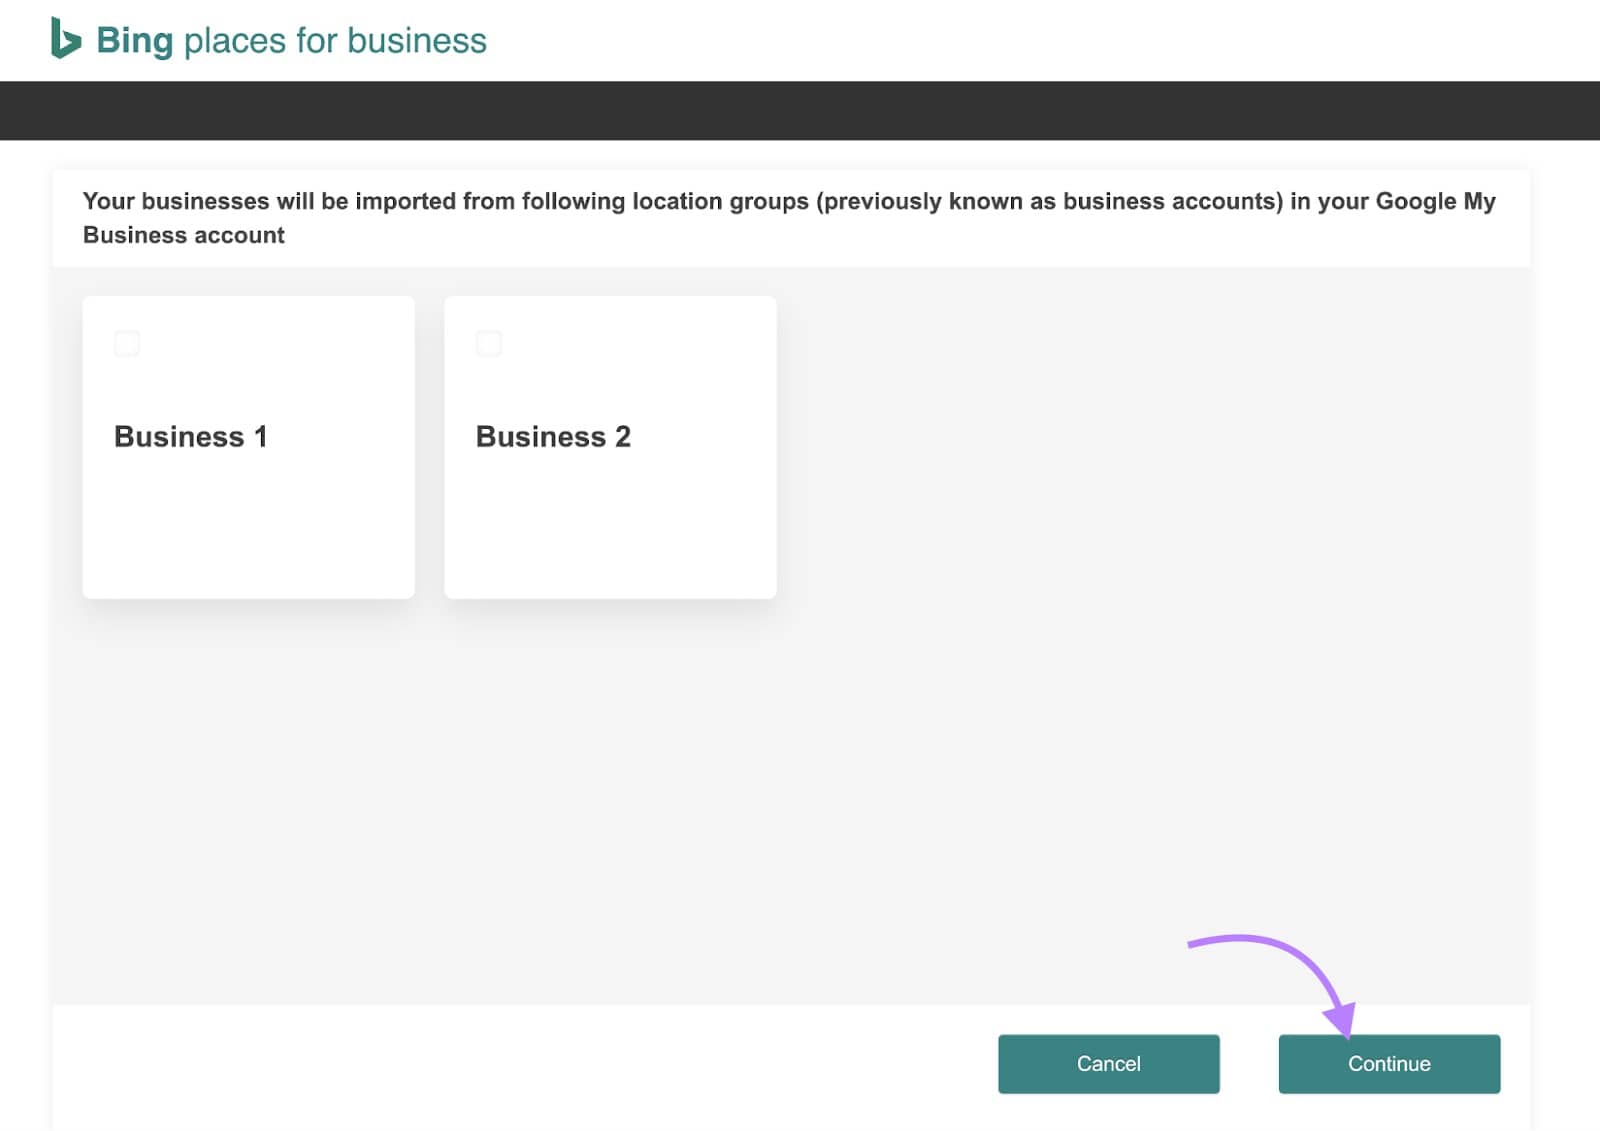
If you choose the first option, click the Import from Google My Business now option to import your listing from Google. Then, choose the business you want to import (if you have multiple brands). And hit Continue.
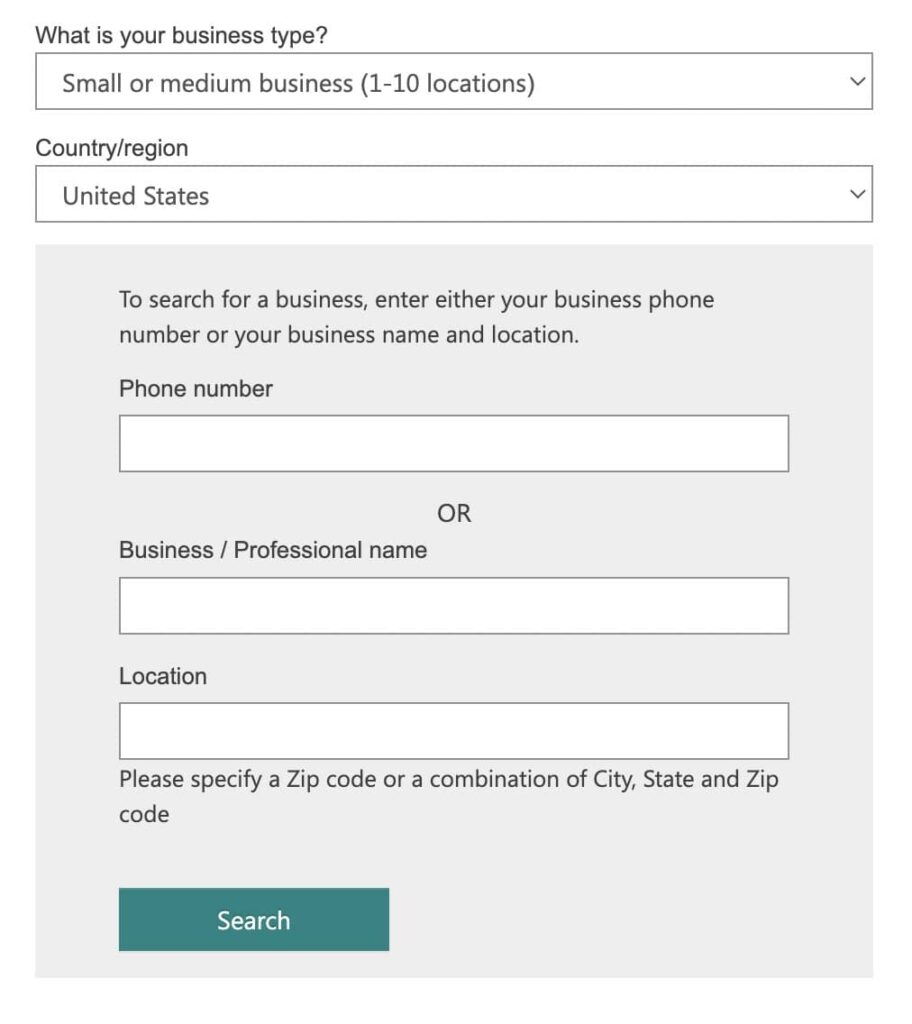
All the details will get copied from your Google listing. You will get an instant verification if your listing is already verified on Google Business Profile.If you choose the manual option, you need to select your business type and location from the drop-down list. Then search for your business name and location or enter your business phone number.
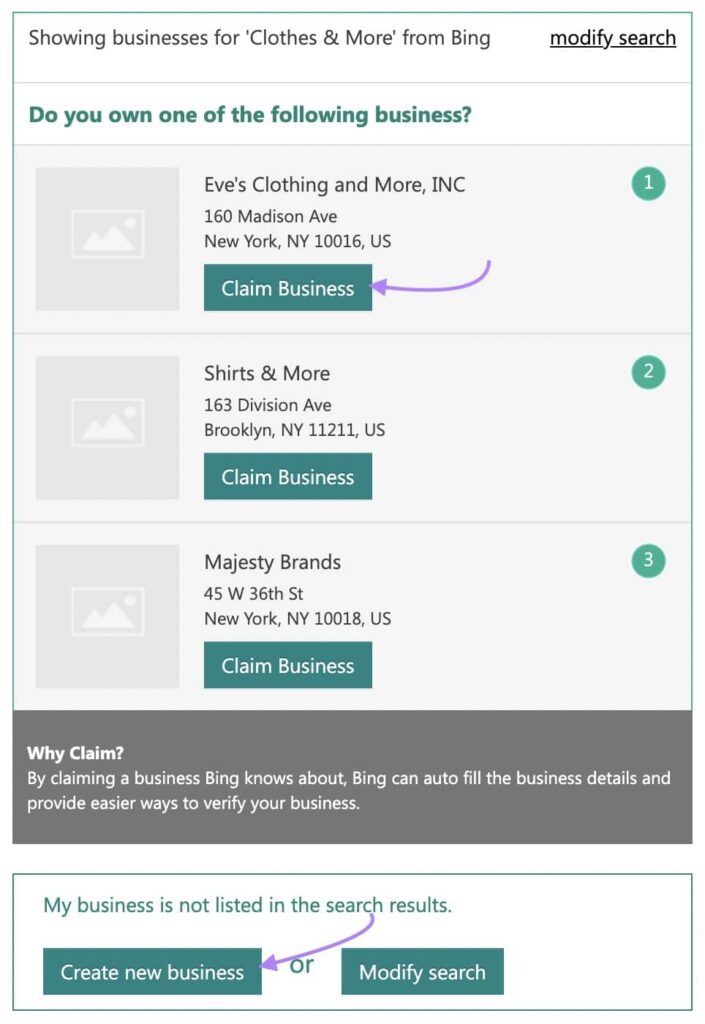
Usually, your business is already on the list. Just click Claim Business to make it yours. If you can’t find it, click My business is not listed, and you can either create a new one or search again.
- Complete Your Business Listing: If your business is already listed, you need to confirm all the information about your business is accurate or not. If it’s not, you can edit it.If you are making your business profile from scratch, you will be required to follow the below-mentioned steps:
Start by providing the following information:
- Business name
- Phone number
- Address
- Website
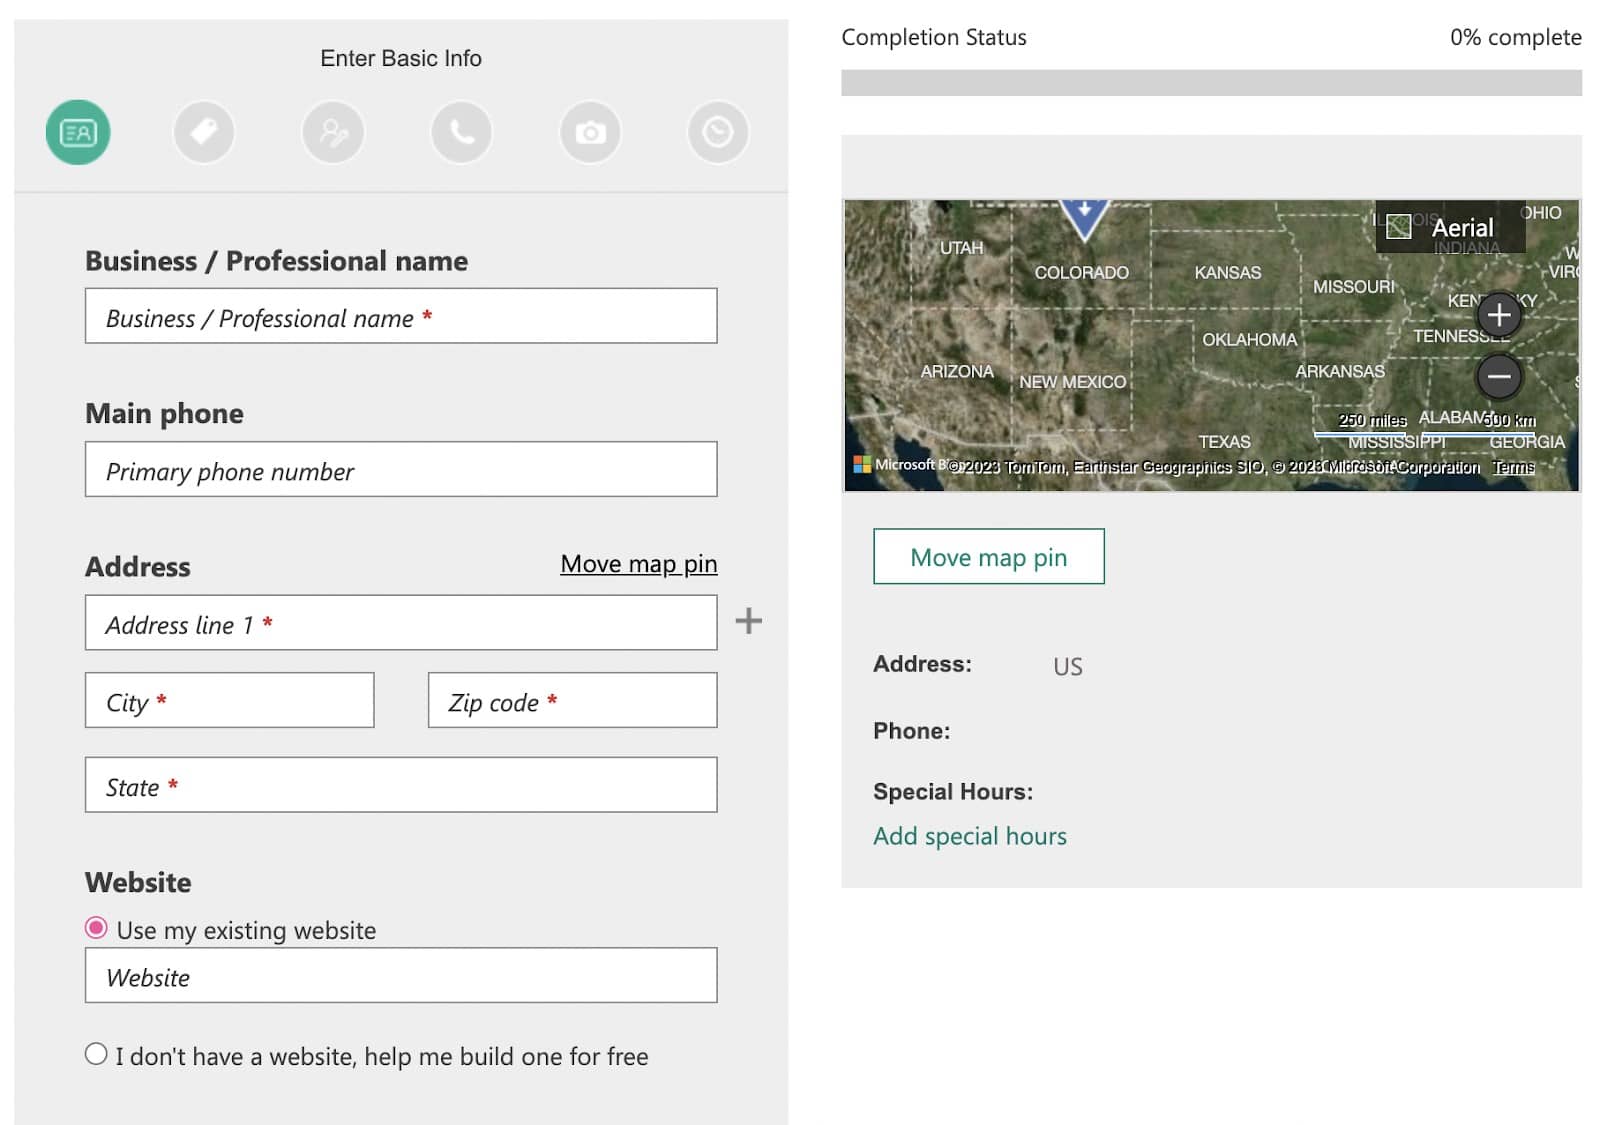
Next, choose the Segment of Business. This refers to the category of your business. You can choose one or more relevant categories.
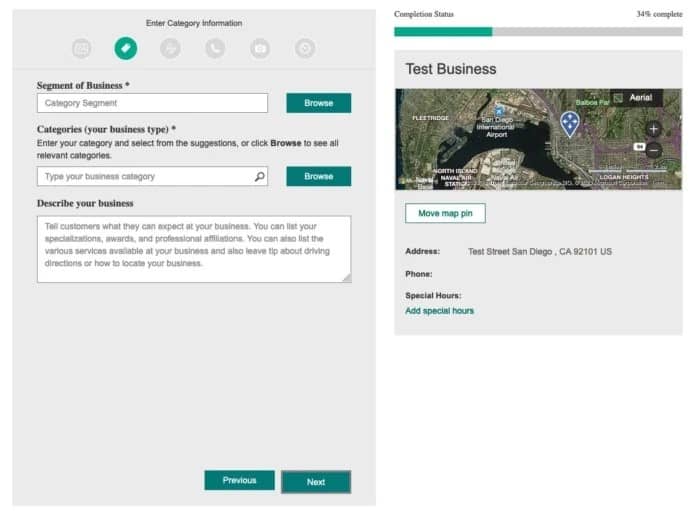
Also, fill in the description for your business. Include all the products and services you offer.Apart from this information, you can also add a social media profile, up to 100 photos of your business, and operation hours.
- Verify Your Bing Business Listing: Finally, you will have to complete a verification step to prove that the business you’re listing is both real and actually yours.
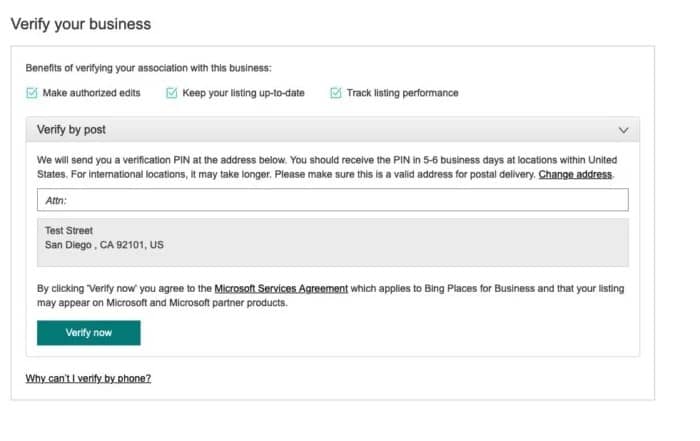
You can verify your account in a few ways:- Get a pin through a call or text to your business phone number.
- Verify by email, which you’ll get within 15 minutes after requesting verification.
- Answer some questions from Bing.
- Use a pin from a postcard sent to your business address (this might take up to 12 days).
Once your account is verified, your listing will be visible to potential customers.
How to Create A Strong Bing Business Listing?
Creating a Bing Business Listing is just the start of optimizing your local SEO presence on Bing. Here are the top five ways to further increase your presence.
- Incorporate Relevant Keywords: It’s crucial to include relevant keywords in your business description on Bing Places. The simplest way is to keep your description short and clear. Instead of selling your business, just say what you do in one sentence. Then, list your services. This way, you’ll naturally include many keywords that people might use to find businesses like yours.
- Encourage Customer Reviews: Good reviews can make more people see and trust your business on Bing. Ask happy customers to leave reviews. When you respond to reviews, it shows you care about what customers think, which can make others trust you too.
- Add Photos and Videos: Visual content can make your listing more attractive and engaging to potential customers. Upload high-quality photos and videos showcasing your products, services, and business premises. This gives customers a better idea of what to expect and can help set your business apart from competitors.
- Keep Your Information Updated: It’s important to update your business information on Bing Places to ensure accuracy. This includes your address, phone number, business hours, and website URL. Keeping this info current helps potential customers find and contact you easily.
- Explore Advertising Options: Consider using Bing Ads to further promote your business on Bing. With targeted advertising options, you can reach potential customers based on factors like location, demographics, and search behavior. Investing in Bing Ads can help increase your visibility and drive more traffic to your business listing.
Final Words!
Bing Places for Business is a great platform to boost your company’s online profile. Whether you run a small business or handle online marketing for a big brand, managing your listings is super important for getting noticed online. If you need help with getting your business listed on this great platform, you can consult a reliable digital marketing agency like AlgoSaga. They will guide you through the entire process and help boost the visibility of your business.